Managing Sessions
Sessions are live presenting events where you deliver your VR/AR presentation to an audience in real-time. When you start a session, attendees join through a shared link and experience the presentation together as you control the flow — advancing slides, triggering interactions, and guiding the group through the content.
Navigating to Sessions
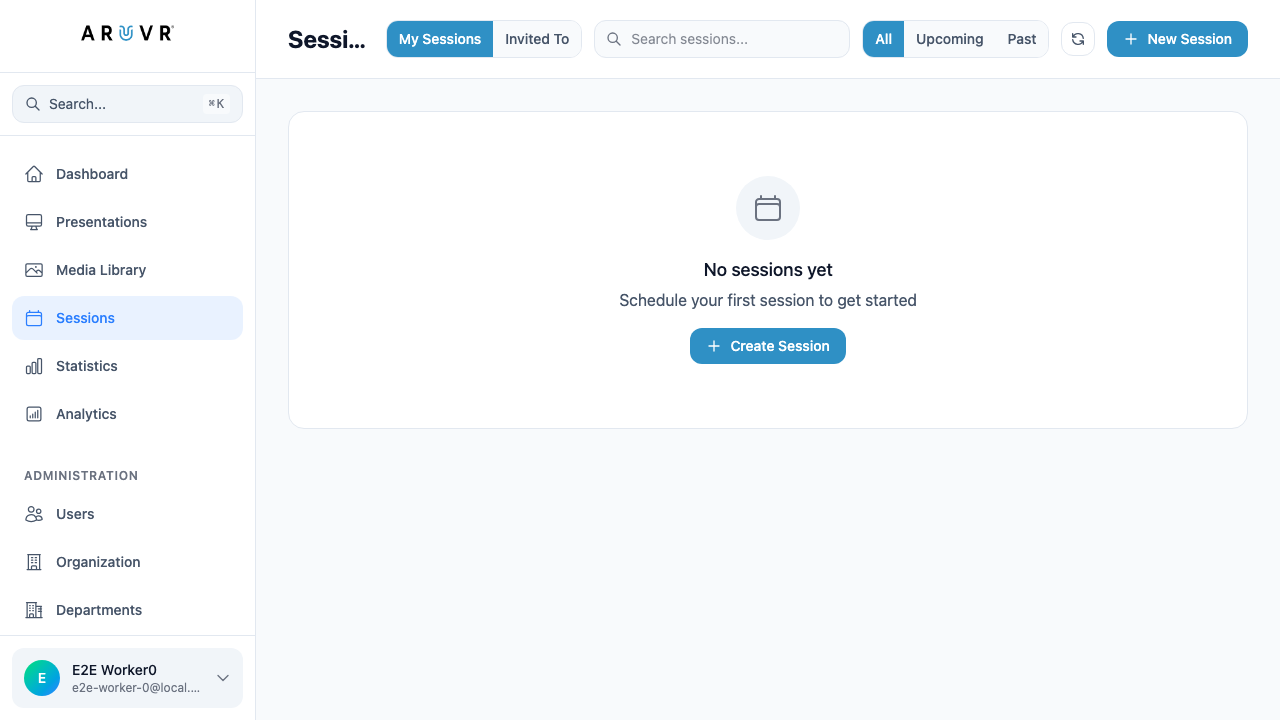
Click Sessions in the left sidebar to open the Sessions page. The sidebar highlights Sessions with a calendar icon to indicate your current location.

Sessions List
The Sessions page displays all your sessions in a list view. The top toolbar provides several ways to find and organize your sessions.
My Sessions vs Invited To
Two toggle buttons at the top let you switch between views:
| Tab | Description |
|---|---|
| My Sessions | Sessions you created and will present. This is the default view. |
| Invited To | Sessions where another presenter has invited you as an attendee. |
The active tab is highlighted in blue.
Search
Use the Search sessions… input field to filter sessions by name. Type any part of a session name to narrow down the list. The results update as you type.
Time Filters
Three filter buttons let you view sessions by their schedule:
| Filter | Description |
|---|---|
| All | Shows every session regardless of date (default) |
| Upcoming | Shows only sessions scheduled in the future |
| Past | Shows only sessions whose date has already passed |
The active filter is highlighted in blue.
Refresh
Click the refresh icon (circular arrows) next to the filter buttons to reload the sessions list with the latest data from the server.
Creating a New Session
There are two ways to create a session:
- Click the + New Session button in the top-right corner of the Sessions page
- If you have no sessions yet, click the + Create Session button in the empty state area
Both options open the Create New Session modal.
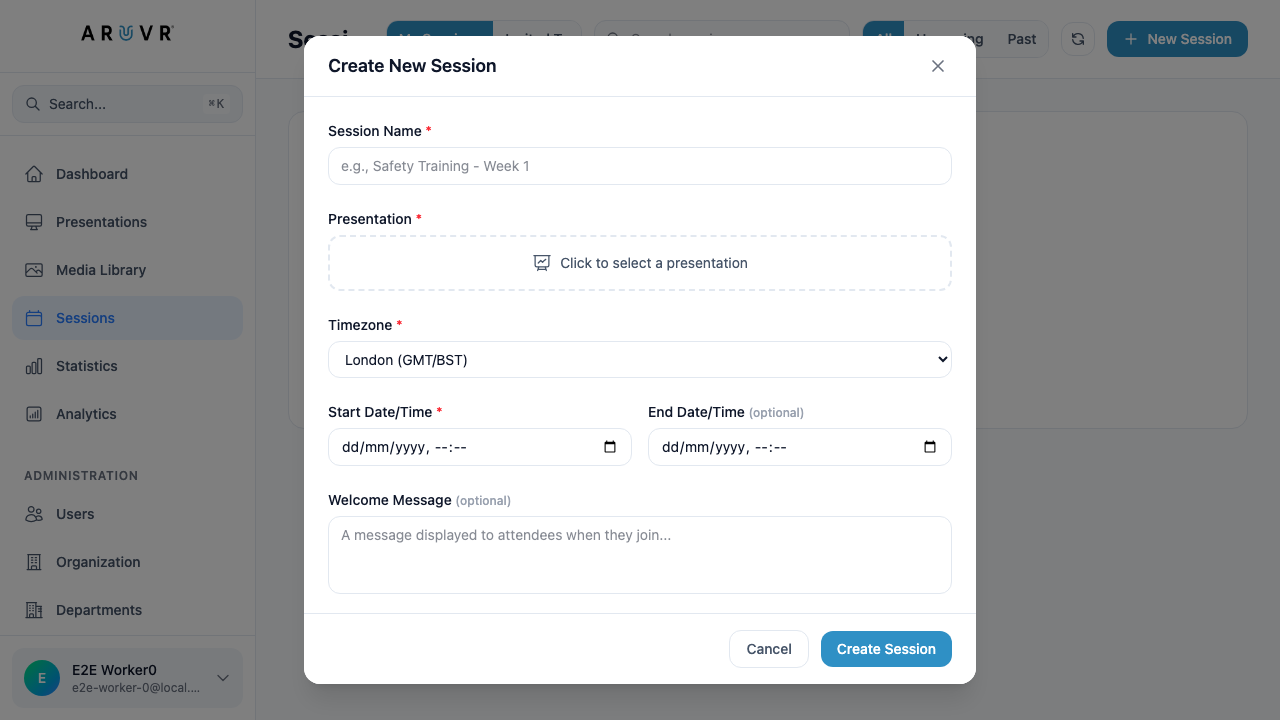
Session Form Fields
Fill in the following fields to create your session:
Session Name (required)
Enter a descriptive name for your session. This name appears in the sessions list and is visible to attendees when they join. Use a name that clearly identifies the training topic and group.
Tip
Use clear, specific names like “Safety Training - Week 1” or “Onboarding Module 3 - Team B” so you can easily distinguish sessions in your list.
Presentation (required)
Click the dashed Click to select a presentation area to choose which presentation to deliver during this session. A selection dialog opens showing all your available presentations. Click a presentation to select it.
Warning
You must have at least one presentation created before you can schedule a session. If the selection area shows no presentations, go to Presentations in the sidebar and create one first.
Timezone
Select the timezone for your session from the dropdown. This ensures the start and end times are displayed correctly for you and your attendees. The default is based on your location (e.g., “London (GMT/BST)”).
Start Date/Time (required)
Set the date and time when the session begins. Click the date picker to select a date, then set the time. Attendees will see this as the scheduled start time for the session.
End Date/Time (optional)
Optionally set a date and time when the session ends. If left blank, the session remains open until you manually end it. Setting an end time helps attendees know the expected duration and allows the system to automatically mark the session as completed.
Welcome Message (optional)
Enter a message that attendees see when they first join the session. Use this to provide instructions, set expectations, or welcome participants. For example: “Welcome to today’s safety training. Please ensure your VR headset is connected before we begin.”
Submitting the Form
Once you have filled in the required fields, click Create Session to schedule it. The session appears in your My Sessions list. Click Cancel to close the modal without creating a session.
Managing Sessions
Once sessions appear in your list, you can manage them directly from the Sessions page.
Viewing Session Details
Click on a session card to expand its details. You can see the session name, associated presentation, scheduled date and time, timezone, and welcome message.
Editing a Session
Click the edit icon on a session card to modify its details. The same form fields from creation are available for editing. Update any field and save your changes.
Viewing Attendees
Click the attendees icon on a session card to open the Attendees modal. This shows everyone who has been invited to or joined the session. From here you can:
- See the list of attendees and their status (invited, joined, completed)
- Track attendance and participation
- Remove attendees if needed

Deleting a Session
Click the delete icon on a session card to remove it. A confirmation dialog appears asking you to confirm the deletion. Deleting a session is permanent — all associated attendee data and invitations are removed.
Warning
Deleting a session cannot be undone. Make sure you no longer need the session’s attendee data or analytics before deleting it.
Inviting Attendees
After creating a session, you need to invite attendees so they can join when the session begins.
Sharing the Session Link
Each session has a unique join link. Share this link with attendees via email, messaging apps, or your organization’s communication channels. Anyone with the link can join the session when it starts.
Inviting by Email
You can also invite attendees directly by entering their email addresses in the session’s attendee management view. Invited attendees receive a notification with the session details and a link to join.
Info
Attendees do not need an ARuVR account to join a session. They can access the presentation through the shared link using a web browser, mobile device, or VR headset.
Presenting a Session
When it is time to present, navigate to the session and click Start (or use the Present to Audience option from the editor — see Testing Your Presentation for details). This opens the presenter view where you control the session in real-time.
As the presenter, you can:
- Advance slides — Move forward and backward through the presentation
- Control markers — Trigger behaviors, show/hide markers, and play media
- Monitor attendees — See who has joined and track their engagement
- End the session — Close the session when the presentation is complete
Tip
Run through your presentation using Test in VR before your live session to make sure all slides, markers, and behaviors work as expected. See Testing Your Presentation for details.