2D Markers on VR/360 Slides
VR/360 slides support a rich set of 2D marker types that you can place onto the 360-degree panorama. These markers are rendered as flat overlays projected onto the interior of the panoramic sphere, and viewers can interact with them by looking, clicking, or tapping.
Marker Type Summary
| Marker Type | Code | Triggers | Key Features |
|---|---|---|---|
| Text | text |
click, hover in/out, idle | Rich text, custom fonts, colors, background |
| Icon | icon |
click, hover in/out, idle | 997 icons across 12 categories, customizable color/size |
| Link | link |
click, hover in/out, idle | Opens a URL, custom display text |
| Shape | shap |
click, hover in/out, idle | 6 shape types, fill color, border color |
| Image | mimg |
click, hover in/out, idle, play, end play | Media library images, displayed on the panorama |
| Video | mvid |
click, hover in/out, idle, play, end play | Embedded video playback on the panorama |
| Audio | audi |
click, hover in/out, idle, play, end play | Invisible audio source, positional audio |
| Poll | mpol |
click, hover in/out, idle, option triggers | True/false, single answer, multiple choice |
| Stream | stre |
click, hover in/out, idle | Live video stream (VR/360 only) |
Info
All 2D marker types share four common triggers: Click, Hover In, Hover Out, and Idle. Media markers (Image, Video, Audio) add Play and End Play. Polls have additional option-based triggers. See Behavior Triggers for the full reference.
Positioning on the 360 Sphere
On VR/360 slides, markers are placed on the interior surface of a 360-degree panoramic sphere. The position coordinates (X, Y, Z) in the properties panel correspond to the marker’s placement on this sphere. You can reposition markers by:
- Dragging the marker directly on the canvas
- Editing coordinates in the Transform section of the properties panel
The canvas displays an equirectangular projection of the panorama, so markers near the top and bottom edges may appear stretched in the editor but will look correct in VR.
Tip
For best results, use equirectangular panoramic images with a 2:1 aspect ratio as your slide background.
Text Markers
Text markers let you add rich text overlays onto the 360 panorama. They are ideal for titles, labels, instructions, and descriptive content that viewers see as they explore the scene.
Creating a Text Marker
- Click Add in the toolbar to open the QuickAdd modal
- Go to the Elements tab
- Click Text (“Add text content”)
- Enter your text in the creation dialog
- Click Create
Text Properties
Once created, you can customize the text marker through the properties panel:
- Content – Edit the text content directly
- Font size – Adjust the text size
- Color – Set the text color using the color picker or hex value
- Background – Set a background color behind the text
- Transform – Position (X, Y, Z), Rotation (X, Y, Z), and Scale
Use Cases
- Slide titles and headings
- Instructional labels
- Informational annotations on points of interest
- Captions for other markers
Icon Markers
Icon markers place 2D icons from a built-in library of 997 icons onto the panorama. They are useful as visual indicators, navigation aids, or decorative elements.
![]()
Creating an Icon Marker
- Click Add in the toolbar
- Go to the Elements tab
- Click 2D Icon (“Add a flat icon”)
- Browse or search the icon library (997 icons available)
- Select an icon and click Select Icon
Icon Library Categories
The icon library is organized into 12 categories:
| Category | Count | Examples |
|---|---|---|
| Arrows & Navigation | 53 | Directional arrows, chevrons, compass |
| Media & Controls | 42 | Play, pause, volume, sliders |
| User Interface | 45 | Menus, settings, search, toggles |
| Communication | 34 | Chat, email, phone, notifications |
| Business & Finance | 39 | Charts, currency, briefcase |
| Files & Documents | 48 | File types, folders, clipboard |
| People & Users | 43 | User profiles, groups, avatars |
| Health & Medical | 52 | Medical symbols, heart, first aid |
| Transportation | 38 | Vehicles, maps, location pins |
| Weather & Nature | 32 | Sun, cloud, rain, trees |
| Food & Drink | 31 | Utensils, beverages, food items |
| Animals | 14 | Various animal icons |
| Objects & Tools | 63 | Tools, devices, household items |
| Shapes & Symbols | 36 | Geometric shapes, math symbols |
| VR & Technology | 42 | VR headsets, controllers, tech |
| Hands & Gestures | 24 | Hand signals, pointing, thumbs up |
| Emojis & Faces | 42 | Smiley faces, expressions |
Icon Properties
- Color – Customize the icon color
- Size – Adjust the icon scale
- Transform – Position, rotation, and scale on the panorama
Tip
Use the search bar at the top of the icon selector to quickly find icons by name. You can also double-click an icon to select it immediately.
Link Markers
Link markers create clickable buttons on the panorama that open a URL when activated. They are useful for directing viewers to external resources, websites, or supplementary content.
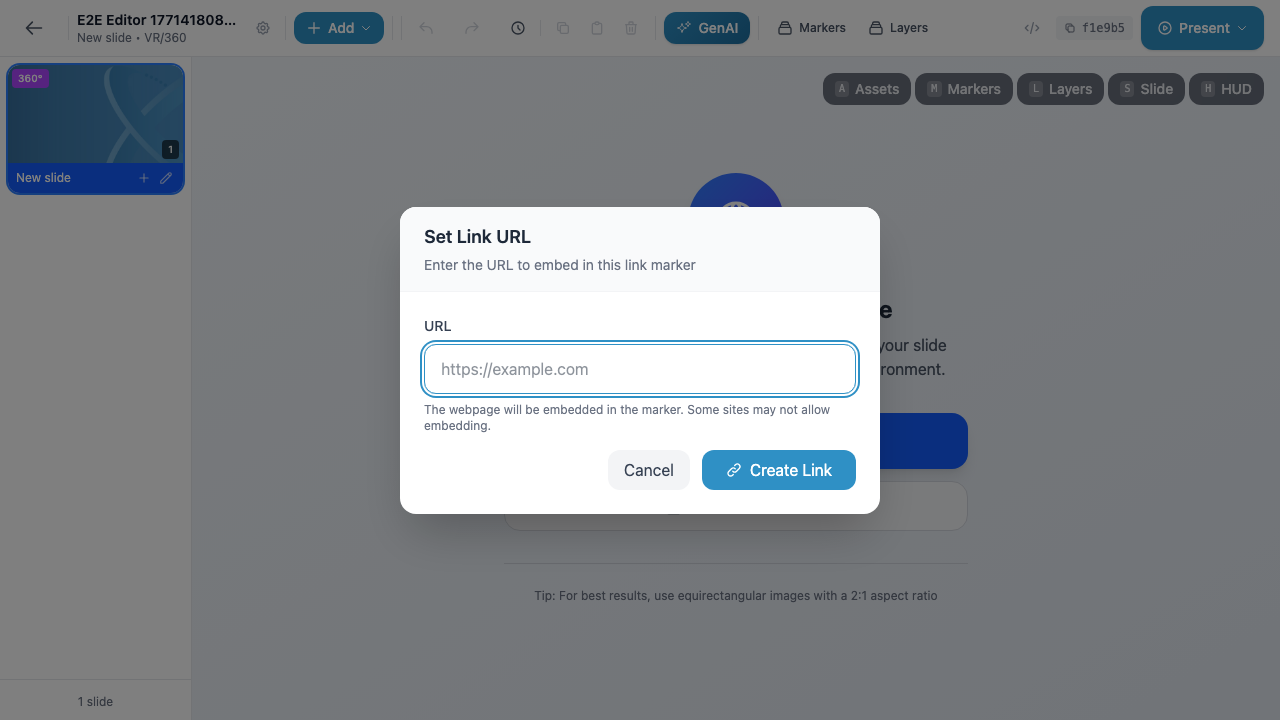
Creating a Link Marker
- Click Add in the toolbar
- Go to the Elements tab
- Click Link (“Add a URL link”)
- Enter the target URL in the dialog (e.g.,
https://example.com) - Click Create Link
Link Properties
- URL – The web address the link opens
- Transform – Position, rotation, and scale on the panorama
Warning
The linked webpage is embedded in the marker. Some websites may not allow embedding due to their security policies (X-Frame-Options or Content-Security-Policy headers). Test your links to make sure they work as expected.
Shape Markers
Shape markers add geometric 2D shapes to the panorama. You can use them as backgrounds, highlights, decorative elements, or as invisible hit areas for behaviors.
Creating a Shape Marker
- Click Add in the toolbar
- Go to the Shapes tab
- Click one of the available 2D shapes
Available Shapes
| Shape | Description |
|---|---|
| Rectangle | A four-sided rectangle |
| Circle | A circular/elliptical shape |
| Triangle | A three-sided triangular shape |
| Arrow | A directional arrow shape |
| Diamond | A diamond/rhombus shape |
| Star | A five-pointed star shape |
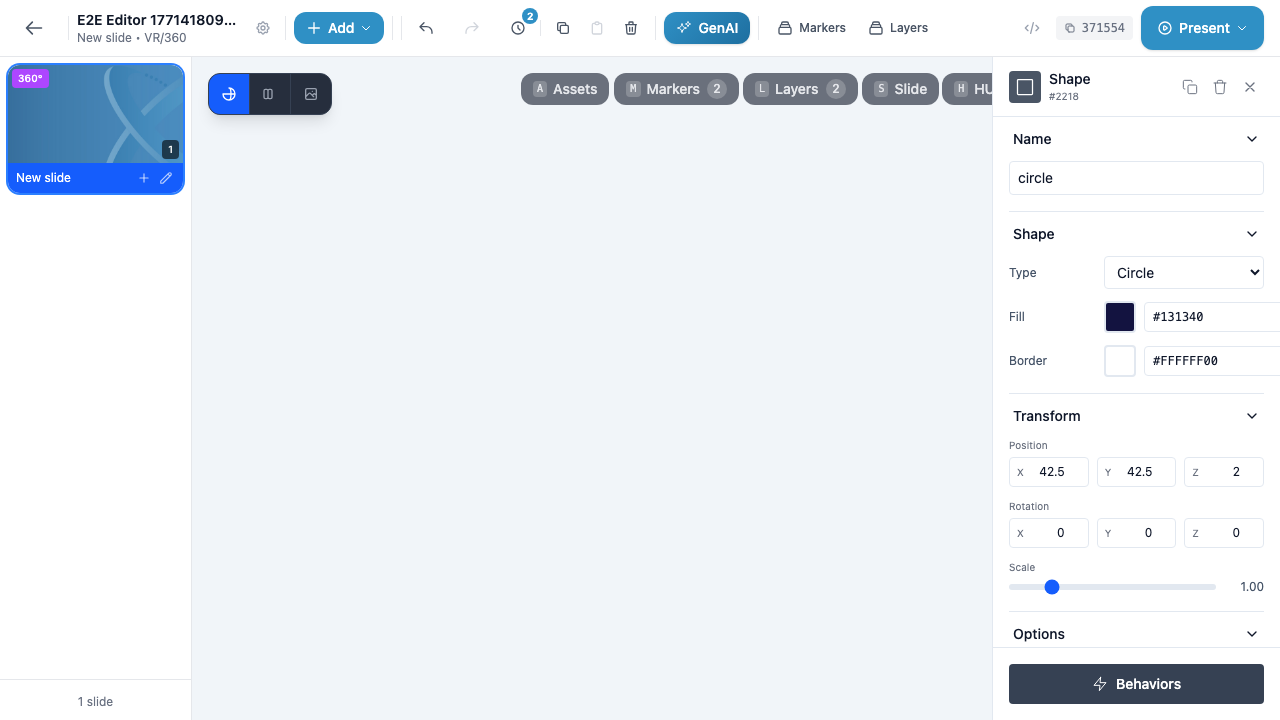
Shape Properties
- Type – Change the shape type from the dropdown (Rectangle, Circle, Triangle, Arrow, Diamond, Star)
- Fill – Set the fill color using the color picker or hex value (e.g.,
#131340) - Border – Set the border/stroke color (use
#FFFFFF00for no border) - Transform – Position (X, Y, Z), Rotation (X, Y, Z), and Scale
Tip
Shapes with a transparent fill and visible border work well as highlight rings or attention-drawing outlines around other markers.
Image Markers
Image markers display images from your media library directly on the panorama. They support common image formats and can be used for photos, diagrams, logos, or any visual content.
Creating an Image Marker
- Click Add in the toolbar
- Go to the Media tab
- Select an image from your existing media library, or upload a new one
- Click the image to add it to the slide
Image Properties
- Source – The media library image file
- Transform – Position, rotation, and scale on the panorama
Additional Triggers
Image markers support two extra behavior triggers beyond the common set:
- Play – Fires when the image starts displaying (useful for sequenced reveals)
- End Play – Fires when image display completes
Video Markers
Video markers embed video playback directly on the panorama. Viewers can watch videos within the VR experience without leaving the presentation.
Creating a Video Marker
- Click Add in the toolbar
- Go to the Media tab
- Select a video from your media library, or upload a new one
- Click the video to add it to the slide
Video Properties
- Source – The media library video file
- Transform – Position, rotation, and scale on the panorama
- Autoplay – Whether the video plays automatically when the slide loads
Additional Triggers
Video markers have two extra behavior triggers:
- Play – Fires when the video starts playing
- End Play – Fires when the video finishes playing
Info
You can use behaviors to control video playback: Play, Pause, and Seek actions let you start, stop, or jump to a specific time in the video based on user interactions with other markers.
Audio Markers
Audio markers are invisible audio sources placed in the scene. While they have no visual representation on the panorama, they play audio that viewers hear during the presentation.
Creating an Audio Marker
- Click Add in the toolbar
- Go to the Media tab
- Select an audio file from your media library, or upload a new one
- Click the audio file to add it to the slide
Audio Properties
- Source – The media library audio file
- Transform – Position in the scene (affects spatial audio directionality)
Additional Triggers
Audio markers support:
- Play – Fires when audio starts playing
- End Play – Fires when audio finishes playing
Tip
Even though audio markers are invisible, they still appear in the Layers panel. You can select them there to edit properties or add behaviors. Use the Hidden option with a Show behavior to start audio playback at a specific moment.
Poll Markers
Poll markers add interactive polls and quizzes to your presentation. They are a powerful tool for audience engagement, knowledge checks, and gathering real-time feedback during sessions.
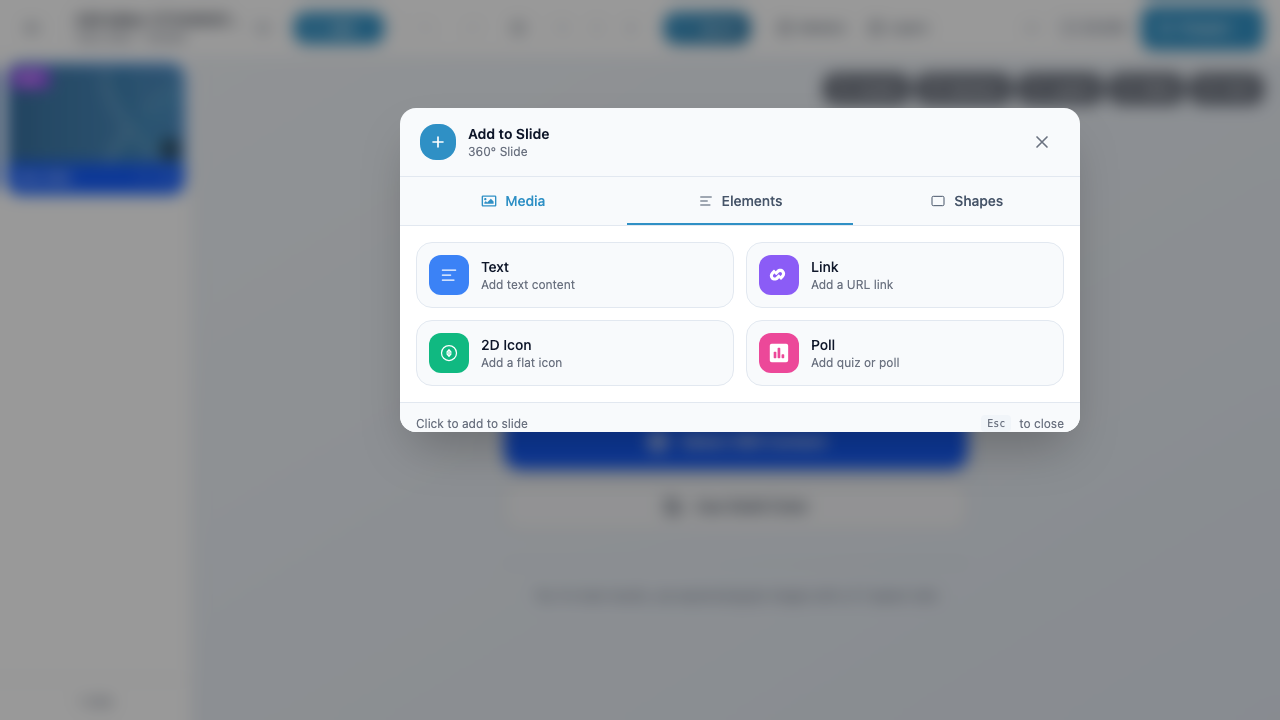
Creating a Poll Marker
- Click Add in the toolbar
- Go to the Elements tab
- Click Poll (“Add quiz or poll”)
- Choose the poll type and configure options
Poll Types
| Poll Type | Code | Options | Correct Answer | Best For |
|---|---|---|---|---|
| True/False | polt |
2 options (True, False) | No | Quick comprehension checks |
| Single Answer | pols |
Up to 4 options | No | Opinion polls, simple quizzes |
| Multiple Choice | polm |
Up to 4 options | Yes | Knowledge assessments, graded quizzes |
Poll-Specific Triggers
Poll markers have unique behavior triggers based on the selected option:
| Trigger | Available On | Description |
|---|---|---|
option_0 |
All poll types | First option selected |
option_1 |
All poll types | Second option selected |
option_2 |
Single Answer, Multiple Choice | Third option selected |
option_3 |
Single Answer, Multiple Choice | Fourth option selected |
correct_answer |
Multiple Choice only | The correct option selected |
Poll-Specific Actions
- Show Results – Display the aggregated poll results to all participants
Info
During a live session, poll responses are collected from all attendees in real time. Use the Show Results behavior action to reveal aggregated results after everyone has voted.
Stream Markers
Stream markers embed a live video stream directly on the panorama. This allows presenters to broadcast a live camera feed or screen share within the VR experience.
Creating a Stream Marker
- Click Add in the toolbar
- Go to the Elements tab
- Click Stream (available on VR/360 slides only)
Stream Properties
- Source – The live stream source
- Transform – Position, rotation, and scale on the panorama
Warning
Stream markers are only available on VR/360 slides. They do not appear in the QuickAdd modal on VR/3D or AR slide types. If you need live video on a 3D or AR slide, consider an alternative approach such as a video marker with a pre-recorded feed.
Marker Availability on VR/360
The following table summarizes which marker types you can add to VR/360 slides and where to find them in the QuickAdd modal:
| Marker Type | QuickAdd Tab | Available on VR/360 |
|---|---|---|
| Text | Elements | Yes |
| 2D Icon | Elements | Yes |
| Link | Elements | Yes |
| Poll | Elements | Yes |
| Stream | Elements | Yes |
| Rectangle | Shapes | Yes |
| Circle | Shapes | Yes |
| Triangle | Shapes | Yes |
| Arrow | Shapes | Yes |
| Diamond | Shapes | Yes |
| Star | Shapes | Yes |
| Image | Media | Yes |
| Video | Media | Yes |
| Audio | Media | Yes |
| 3D Icon | Elements | No – VR/3D and AR only |
| 3D Shape | Shapes | No – VR/3D and AR only |
| 3D Object | Media | No – VR/3D and AR only |
Tip
For 3D-specific markers (3D Icon, 3D Shape, 3D Object), see 3D Markers.