Marker Properties
Every marker on a slide has a set of properties that control its appearance, position, and behavior. The Properties panel is the central place where you view and edit these properties. This page covers how to find markers using the Layers panel, how to open the Properties panel, and what each section contains.
The Layers Panel
Before you can edit a marker’s properties, you need to select it. The Layers panel lists every marker on the current slide and gives you quick controls for each one.
Press L on your keyboard (or click Layers in the toolbar) to toggle the Layers panel on the right side of the editor.
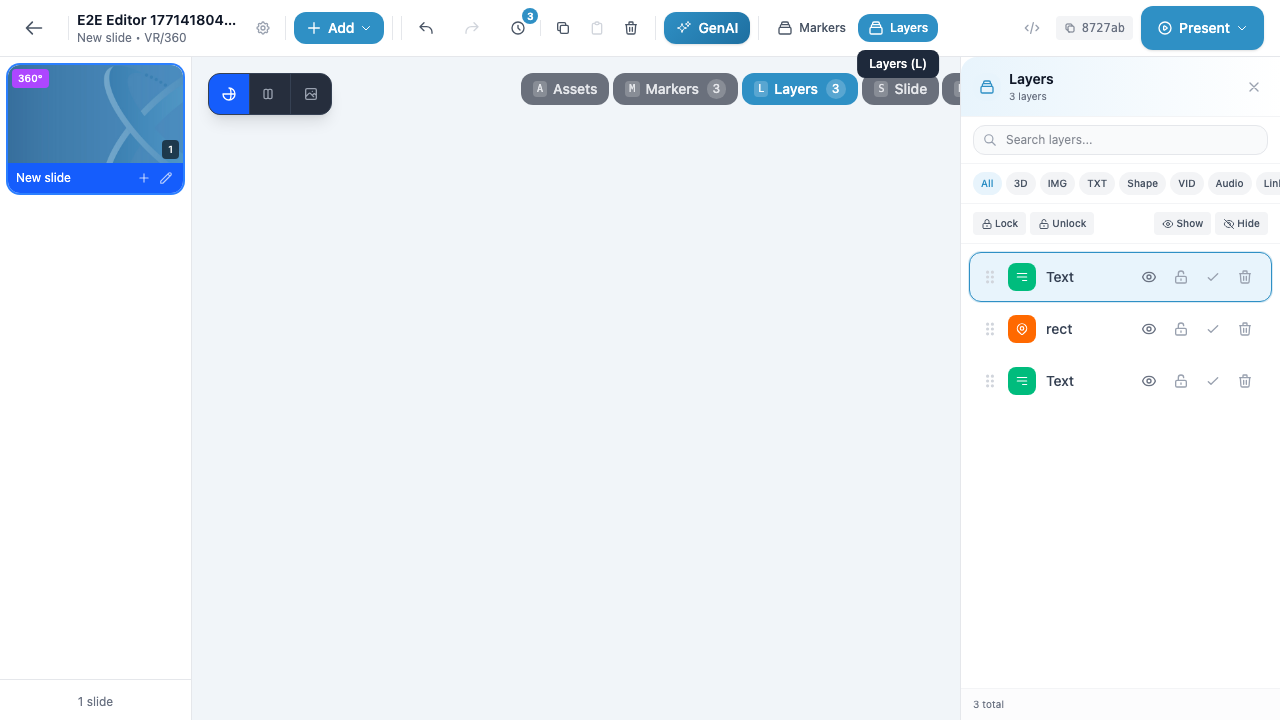
Layers Panel Features
| Feature | Description |
|---|---|
| Search | Type in the search field at the top to filter markers by name |
| Type filters | Click filter buttons (All, 3D, IMG, TXT, Shape, VID, Audio, Link) to show only markers of a specific type |
| Visibility toggle | Click the eye icon to show or hide a marker on the canvas |
| Lock toggle | Click the lock icon to prevent a marker from being moved or edited |
| Select toggle | Click the checkmark icon to select or deselect a marker |
| Delete | Click the trash icon to delete the marker |
| Bulk actions | Use the Lock / Unlock and Show / Hide buttons to apply changes to all markers at once |
| Layer count | The bottom of the panel shows the total number of markers on the slide |
Selecting a Marker
Click a marker’s row in the Layers panel to select it. The selected marker is highlighted with a colored background. You can also click a marker directly on the canvas to select it.
Tip
The Layers panel and Properties panel share the same space on the right side of the editor. When you open one, the other closes. To switch from Layers to Properties, select a marker and press P. To switch back to Layers, press L.
Opening the Properties Panel
There are several ways to open the Properties panel for a marker:
- Select + keyboard shortcut — Select a marker in the Layers panel or on the canvas, then press P
- Double-click — Double-click a marker in the Layers panel
- Toolbar — Click the Layers button in the toolbar to open Layers, select a marker, then press P
The Properties panel appears on the right side of the editor, replacing the Layers panel.
Properties Panel Sections
The Properties panel is divided into collapsible sections. Click the chevron arrow next to any section heading to expand or collapse it.
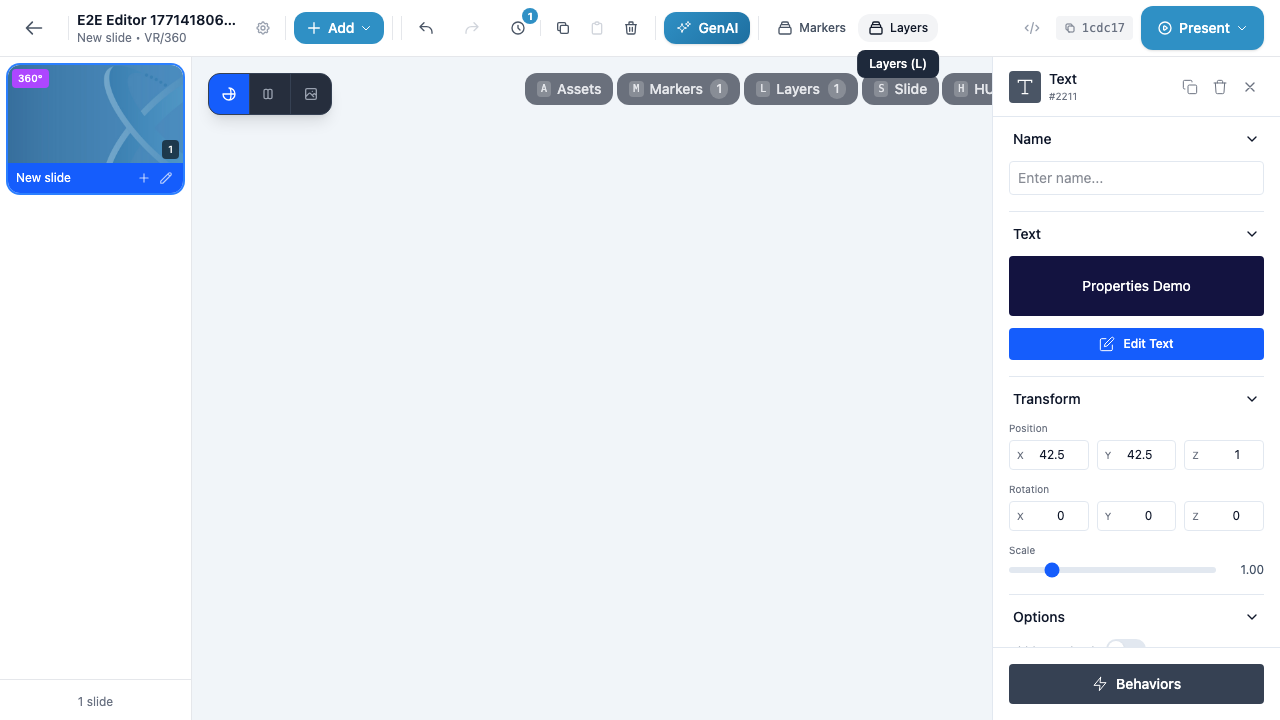
Header
The panel header appears at the very top and contains:
- Marker type icon — A visual icon representing the marker type (e.g., a “T” for text, a square for shapes)
- Type name — The marker type displayed as text (e.g., “Text”, “Shape”, “Image”)
- Marker ID — A unique identifier prefixed with
#(e.g.,#2211) - Duplicate button — Creates an exact copy of the marker on the same slide
- Delete button — Removes the marker from the slide
- Close button — Closes the Properties panel (you can also press Escape or P)
Info
The marker ID is assigned automatically by the system and cannot be changed. It is useful for identifying specific markers when working with behaviors or debugging issues.
Name
The Name section contains a single text input where you can give your marker a custom name. This name appears in the Layers panel instead of the default type name, making it easier to identify markers when you have many on a single slide.
- Type directly into the Enter name… field to set a name
- Leave it blank to use the default type name (e.g., “Text”, “Shape”)
- The name updates immediately in the Layers panel
Tip
Giving your markers descriptive names (e.g., “Welcome Title”, “Next Button”, “Quiz Question 1”) makes it much easier to manage complex slides with many markers, especially when setting up behaviors that reference other markers as targets.
Type-Specific Section
Below the Name section, each marker type displays its own unique properties section. The section heading matches the marker type.
Text Markers
The Text section shows:
- Content preview — A dark preview block displaying the current text content
- Edit Text button — A blue button that opens the text editor where you can modify the text content, font, size, color, alignment, and background
Shape Markers
The Shape section shows:
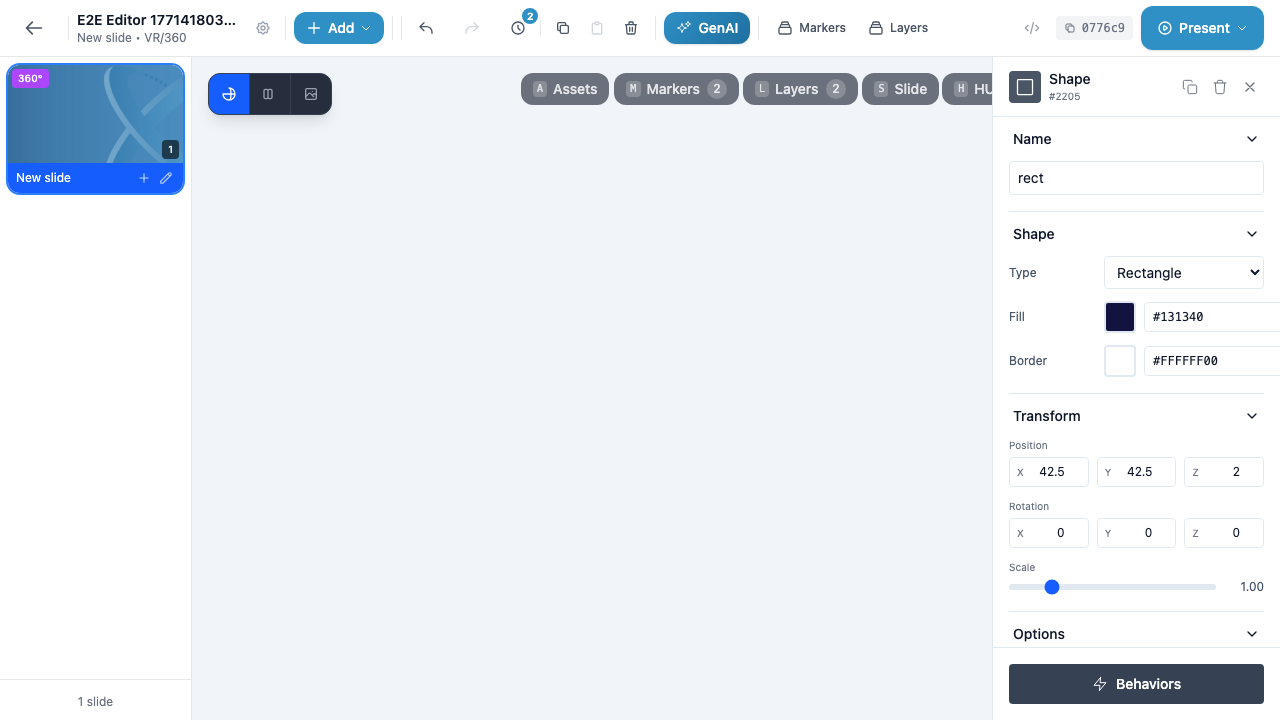
- Type — A dropdown to select the shape type (Rectangle, Circle, Triangle, Arrow)
- Fill — A color swatch and hex input for the shape’s fill color. Click the swatch to open the color picker
- Border — A color swatch and hex input for the shape’s border color. Set the alpha channel to
00(e.g.,#FFFFFF00) for a transparent border
Icon Markers
The Icon section allows you to:
- Browse and search through available icons
- Change the icon color
- Adjust the icon size
Link Markers
The Link section allows you to:
- Set the URL the link opens
- Customize the link display text
- Choose whether the link opens in a new tab
Image / Video / Audio Markers
The Media section shows:
- A preview of the current media file
- Options to replace the media from your library
- Media-specific controls (e.g., autoplay for video, loop for audio)
Poll Markers
The Poll section allows you to:
- Set the poll question
- Configure answer options
- Choose the poll type (True/False, Single Answer, Multiple Choice)
- Set the correct answer (for graded polls)
Transform
The Transform section controls the marker’s position, rotation, and size in 3D space.
Position
Three numeric input fields for X, Y, and Z coordinates:
- X — Horizontal position (left/right)
- Y — Vertical position (up/down)
- Z — Depth position (forward/backward, also controls layering order on 2D slides)
Click any field and type a new value, or use the arrow keys to increment/decrement. Values are expressed in the scene’s coordinate system.
Rotation
Three numeric input fields for rotation around each axis:
- X — Pitch (tilt forward/backward)
- Y — Yaw (turn left/right)
- Z — Roll (tilt sideways)
Values are in degrees (0 to 360).
Scale
A slider control that adjusts the marker’s overall size. The current value is displayed to the right of the slider (e.g., 1.00 for the default size). Drag the slider left to shrink or right to enlarge.
Warning
Scaling a marker to very small values (below 0.1) can make it difficult to select on the canvas. If you lose track of a small marker, use the Layers panel to find and select it.
Options
The Options section contains toggle switches that control marker behavior during presentations. This section is collapsed by default — click the chevron to expand it. See the dedicated Marker Options page for full details on each available option.
Behaviors
At the very bottom of the Properties panel, the blue Behaviors button opens the Behavior Editor modal for the selected marker. From there you can add triggers, actions, and conditions that make the marker interactive. See Behaviors for complete documentation.
Info
If the marker already has behaviors configured, a badge on the Behaviors button indicates the total number of behaviors.
Editing Properties
All property changes in the Properties panel are saved automatically to the server. When you type a new value in a text field, pick a color, adjust the scale slider, or change a dropdown selection, the change is sent to the API immediately.
Editing Transform Values
To edit position, rotation, or scale values:
- Click the numeric field you want to change
- Select the existing value (or triple-click to select all)
- Type the new value
- Press Enter or click outside the field to confirm
The marker updates its position on the canvas in real time as you change the values.
Editing Colors
For markers that support color (shapes, icons, text backgrounds):
- Click the color swatch to open the color picker
- Use the picker to select a new color, or type a hex value directly into the hex input field
- The color updates immediately on the canvas
Duplicating a Marker
Click the Duplicate button (copy icon) in the Properties panel header to create an exact copy of the selected marker. The duplicate is placed on the same slide with the same properties, position, and options. The duplicate receives its own unique marker ID.
Tip
After duplicating, the new marker appears at the same position as the original. Adjust the duplicate’s position in the Transform section so both markers are visible.
Deleting a Marker
You can delete a marker in several ways:
- Click the Delete button (trash icon) in the Properties panel header
- Click the trash icon on the marker’s row in the Layers panel
- Select the marker and press the Delete or Backspace key on your keyboard
Warning
Deleting a marker also removes all behaviors associated with it. This action can be undone with Ctrl/Cmd + Z (undo).