Login & Dashboard
Welcome to ARuVR, the immersive VR/AR presentation platform. This guide walks you through signing in and using the Presentations dashboard – the home screen where you manage all of your content.
Logging In
ARuVR uses a two-step login flow. Navigate to your organization’s ARuVR URL to begin.
Step 1: Enter Your Username or Email
The login page displays the ARuVR logo and a single input field. Type the username or email address associated with your account, then click the Next button to continue.
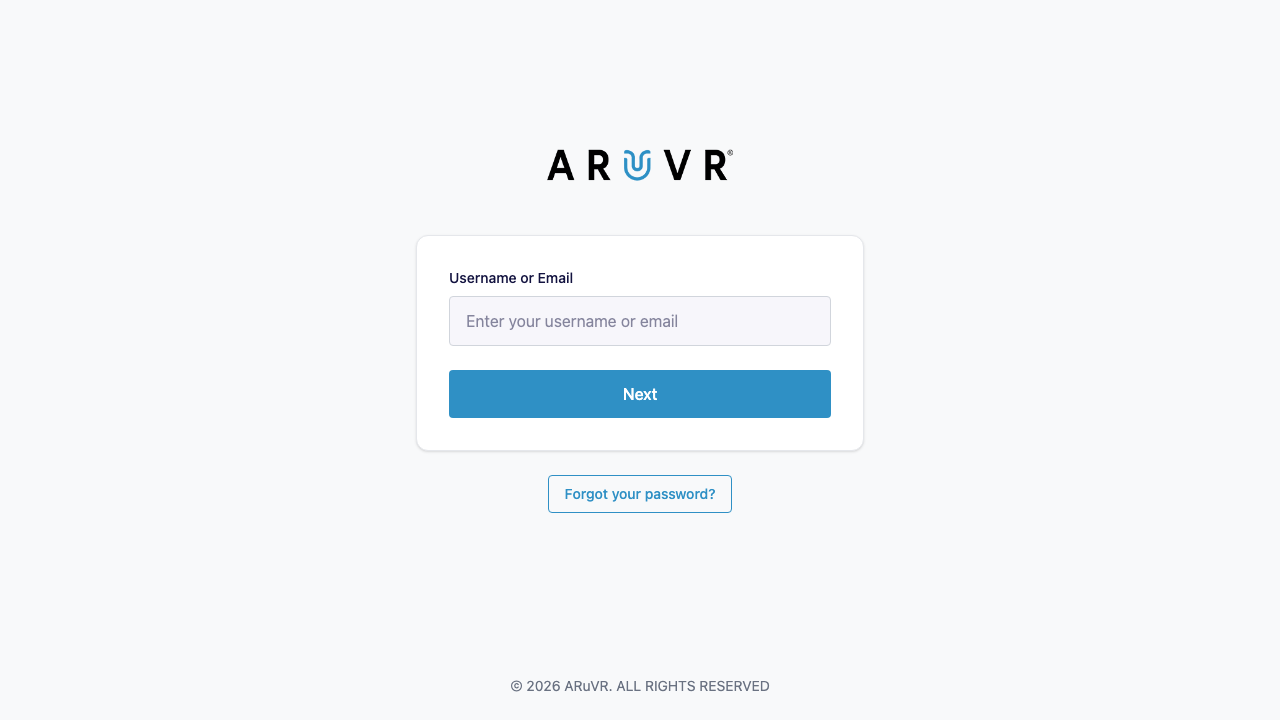
- Username or Email – Enter the address your administrator provided when creating your account (for example,
admin@local.dev). - Next – Advances to the password step. If the account does not exist, you will see an error message.
- Forgot your password? – Opens the password-reset flow. A reset link will be sent to your email.
Step 2: Enter Your Password
After clicking Next, the form changes to show who you are signing in as and prompts for your password.
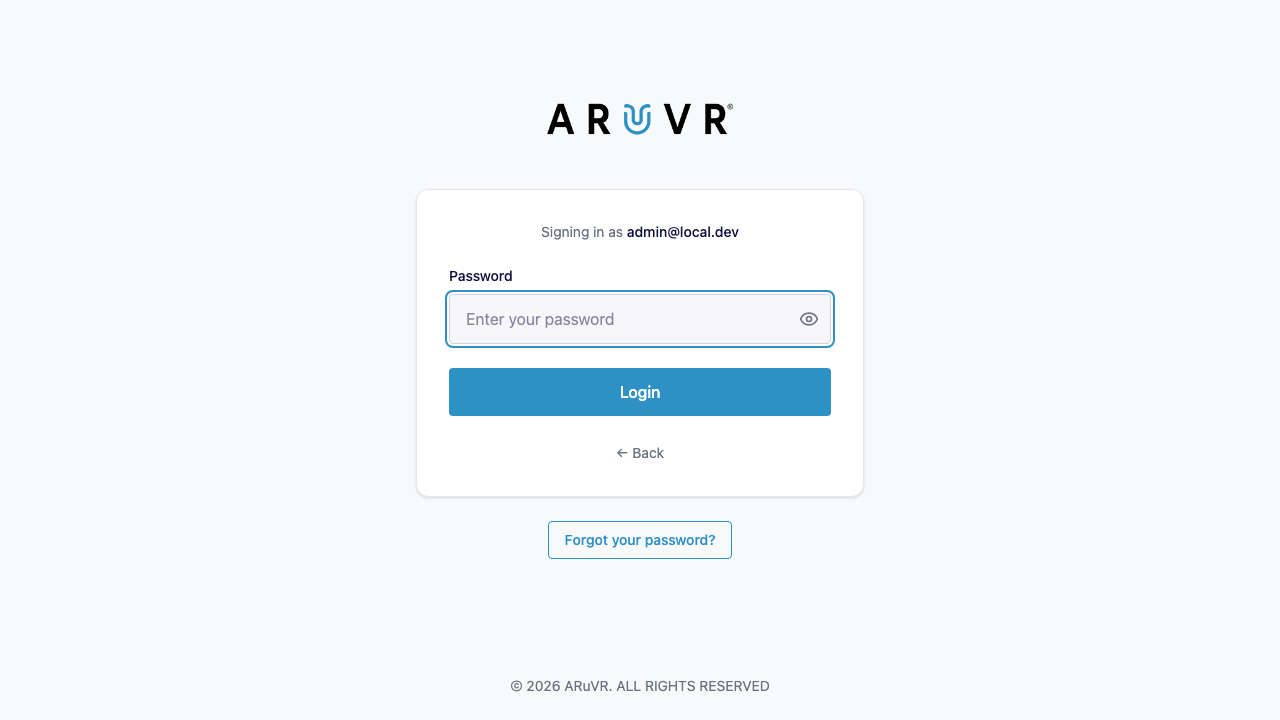
- Signing in as – Displays the username or email you entered in Step 1 so you can confirm the correct account.
- Password – Type your password here. Click the eye icon on the right side of the field to toggle password visibility, letting you verify what you typed.
- Login – Submits your credentials. On success you are redirected to the Presentations dashboard.
- Back – Returns to Step 1 if you need to change the account.
- Forgot your password? – Also available on this step, in case you realize you need to reset your password.
Tip
If you see an “Invalid login” error even though your password is correct, your session may be locked from a previous sign-in. Ask your administrator to unlock your account, or run yarn db:unlock if you are developing locally.
The Presentations Dashboard
After a successful login you land on the Presentations dashboard. This is the central hub for viewing, searching, creating, and managing all of your VR/AR presentations.
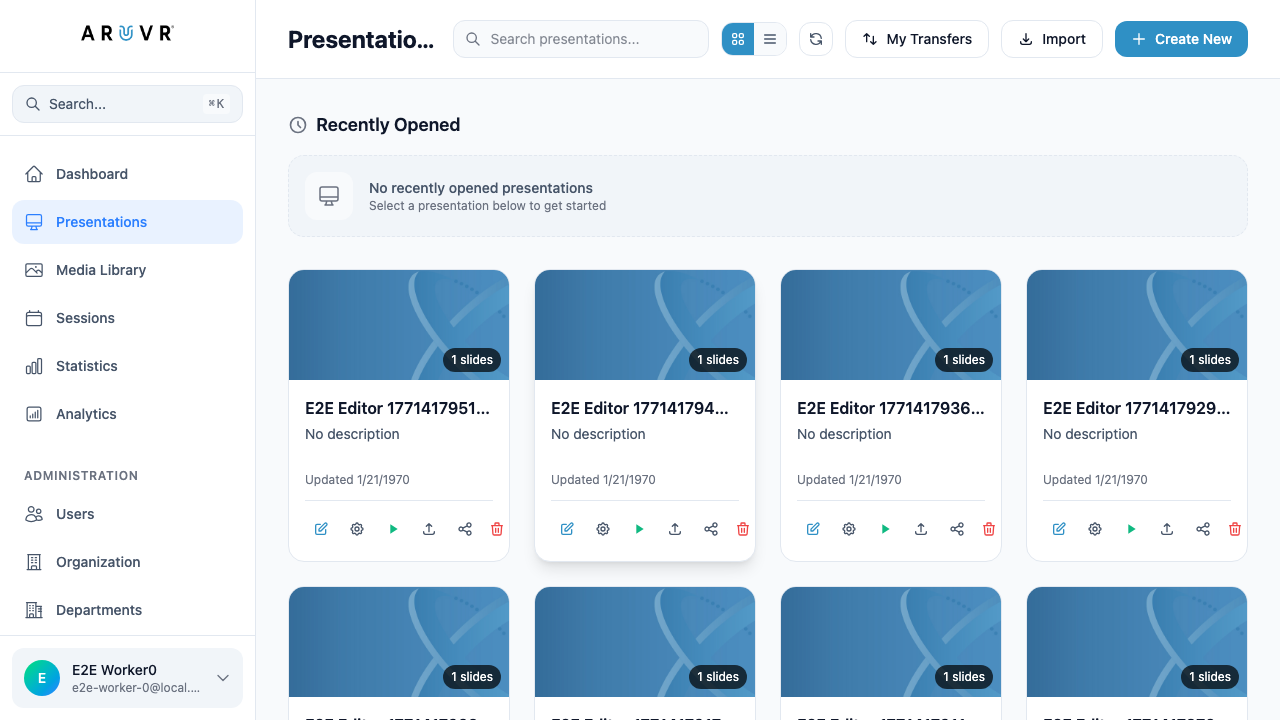
Dashboard Layout
The dashboard is divided into two areas:
- Left sidebar – Navigation links, administration section, and your user profile. See the Navigation page for full details.
- Main content area – The presentations list, search tools, and action buttons described below.
Top Action Bar
The toolbar at the top of the main content area provides quick access to the most common actions:
| Control | Description |
|---|---|
| Search bar | Filter presentations by name. Type any keyword and results update in real time. |
| Grid / List toggle | Switch between a card grid (default) and a compact list view. The grid toggle is the left icon (grid of squares); the list toggle is the right icon (horizontal lines). |
| Refresh | Re-fetches the presentation list from the server. |
| My Transfers | View presentations that have been transferred to you by other users or organizations. |
| Import | Import a previously exported presentation file. |
| + Create New | Open the new-presentation dialog to create a fresh presentation. |
Info
The + Create New button is the fastest way to start building content. Clicking it opens a dialog where you name your presentation, then you are taken straight into the editor.
Recently Opened
Directly below the action bar is the Recently Opened section. It shows presentations you have opened most recently so you can jump back in quickly. If you have not opened any presentations yet, it displays a placeholder message: “No recently opened presentations – Select a presentation below to get started.”
Presentation Cards
Below Recently Opened, your presentations are displayed as cards in a four-column grid (or as rows if you switch to list view). Each card shows:
- Thumbnail – A preview image of the presentation. The slide count badge (for example, “1 slides”) appears in the top-right corner.
- Title – The presentation name. Long names are truncated with an ellipsis.
- Description – A short description, or “No description” if none has been set.
- Updated date – When the presentation was last modified.
Card Action Icons
Along the bottom of every card is a row of action icons. From left to right:
| Icon | Action | Description |
|---|---|---|
| Pencil | Edit | Opens the presentation in the editor where you can add slides, markers, and behaviors. |
| Gear | Settings | Opens the presentation settings dialog to update the title, description, thumbnail, and other metadata. |
| Play triangle | Present | Launches the presentation in viewing/present mode so you can preview or deliver it. |
| Upload arrow | Export | Exports the presentation as a file that can be imported into another ARuVR instance. |
| Share nodes | Share | Shares the presentation with other users in your organization or transfers it to another organization. |
| Trash can | Delete | Deletes the presentation. You will be asked to confirm before it is permanently removed. |
Warning
Deleting a presentation is permanent. All slides, markers, behaviors, and media references within the presentation are removed. Make sure you export a backup first if you may need the content later.
Search
Use the Search presentations… input at the top of the main content area to filter the list. The search matches against presentation titles and updates results as you type. To clear the search, delete the text in the input field.
Tip
You can also use the global search shortcut Cmd + K (macOS) or Ctrl + K (Windows/Linux) from anywhere in the application to quickly find presentations, media, and more. See Navigation for details.
Grid vs. List View
Two view modes are available, controlled by the toggle icons to the right of the search bar:
- Grid view (default) – Displays presentations as visual cards in a multi-column grid. Best when you want to browse thumbnails at a glance.
- List view – Displays presentations as compact rows with the same information (title, description, date) in a table-like layout. Best when you have many presentations and want to scan titles quickly.
Your selected view mode persists across sessions.
Next Steps
- Navigation – Learn about the sidebar, global search, and administration sections.
- Presentations – Deep dive into creating and managing presentations.
- Sessions – Set up live presentation sessions for your audience.